If you accidentally delete or overwrite your “local” SharePoint certificate, you may find random things breaking such as Visio or Excel web parts, or things that require authentication.
You can check to see what certificate you have installed, and see if this might be the case by typing the following in Powershell:
Get-SPTrustedRootAuthority
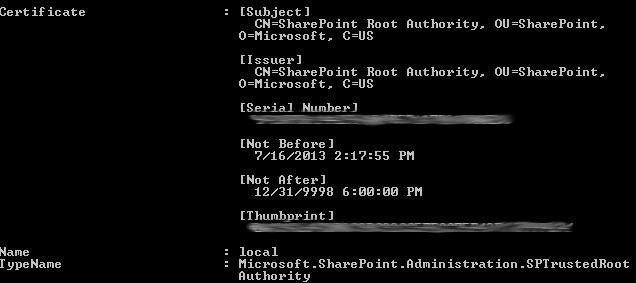
Examine the “local” entry. If it does not say “SharePoint Root Authority” for the certificate, you will need to fix this. It should look something like this if it is correct:

If your cert does not look like the one above, and you have a multi-server farm, you should still be in luck. Log on to one of the other servers, and fire up SharePoint Management Shell.
Type the following:
$localCert = (Get-SPCertificateAuthority).RootCertificate$localCert.Export("Cert") | Set-Content "C:\localCert.cer" -Encoding byte
Log on to the machine with the incorrect certificate (likely your Central Admin server), and copy the exported certificate there. Again in PS:
Get-SPTrustedRootAuthority
Find the “Id” for the “local” certificate.
Import the certificate.
$localCert = New-Object System.Security.Cryptography.X509Certificates.X509Certificate2("c:\localCert.cer")
Using the Id you noted above for the “Identity”:
Set-SPTrustedRootAuthority -Identity "3e20f374-6d2e-4115-bbb8-40d9dd803d5d" -Certificate $localCert
Finally, check your work:
Get-SPTrustedRootAuthority
This should put you back in business.
