1) Set up a Document Library that will house the “temporary” documents (ie. the documents that you plan on having automatically filed). For instance “New Documents.”
2) Then set up a separate “Custom” list that you will use as your routing list. In this list enter all the names of the various other document libraries that you want to file your documents to. For instance “Tax Records” and “Property Records.”

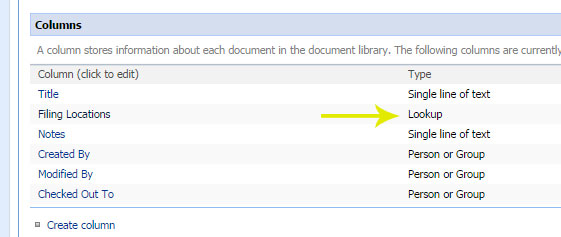
3) Go back to your “New Documents” library that you just created, and add a new column under “Document Library Settings.” Give it a content type of “Lookup”, and tie it to the list you created in step 2. Call it “Filing Location.” *This can also be done with metadata if you have it enabled.
4) Now that you have your infrastructure set up, it is time to create a workflow to automatically file the documents. Open SharePoint Designer, and browse to your site. Choose to create a new workflow.
5) Link the workflow to your “New Documents” library. Choose to activate the workflow whenever a new item is added. Enter the workflow steps in the following format:
- Choosing to examine the “Filing Location” column.
- If it matches one of the types you identify, choose to pause it for the time you desire to have it displayed in the “New Documents” library. In this case, I will choose 5 days.
- Then have the workflow copy the document (“Current Item”) to the desired matching document library.
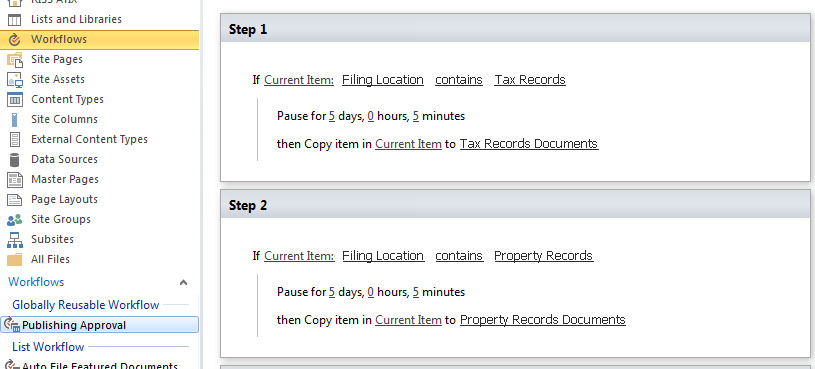
6) Repeat the previous step as many times as is necessary for the different document libraries you wish to file your documents to.
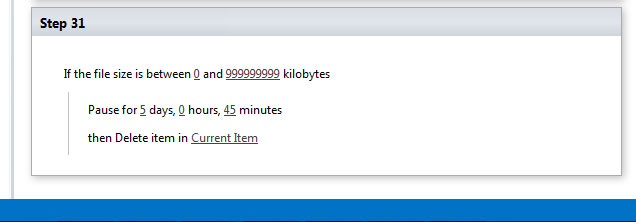
7) Finally, for the last step, choose to examine the file, and then pause it for a time period greater than the time you chose for step 5. Then add an instruction to delete the item after that time has passed.
8) Save the workflow.
9) Now when you add documents to the “New Documents” folder, they will be automatically filed. However, when you upload them, you will also need to choose where they get filed under the “Filing Locations.”