Display Metadata Tags in SharePoint Search Core Results

SharePoint 2010 and onwards has the excellent feature of being able to tag content with customizable metadata.  This great for using the refining options that are built into the framework.  For whatever reason however, Microsoft does not display this metadata in the actual results, so if you want too refine the search results by tag/metadata, it is really just a matter of guesswork.

Fortunately, there is a solution that is pretty easy to plug in which resolves this problem, provided you do not mind getting your hands dirty with a little XSL / XSLT.

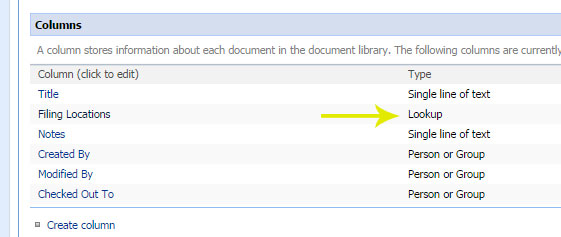
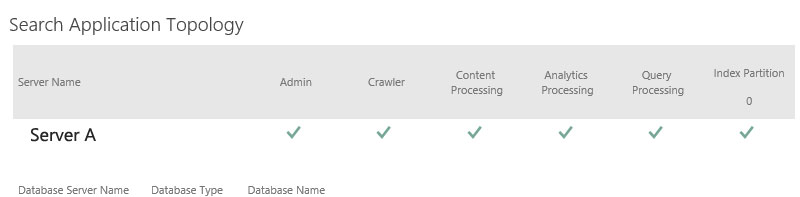
The first thing you are going to need to do is identify the “Mapped To Property” that you want to display results for in the search results.  This will begin with “ows_taxId_” in the “Search Schema” section for your Search Application (in Central Admin).

My metadata is just called “Tags”, so the “Mapped to Property” is “owstaxidtags”.  The critical piece is that you remember this.

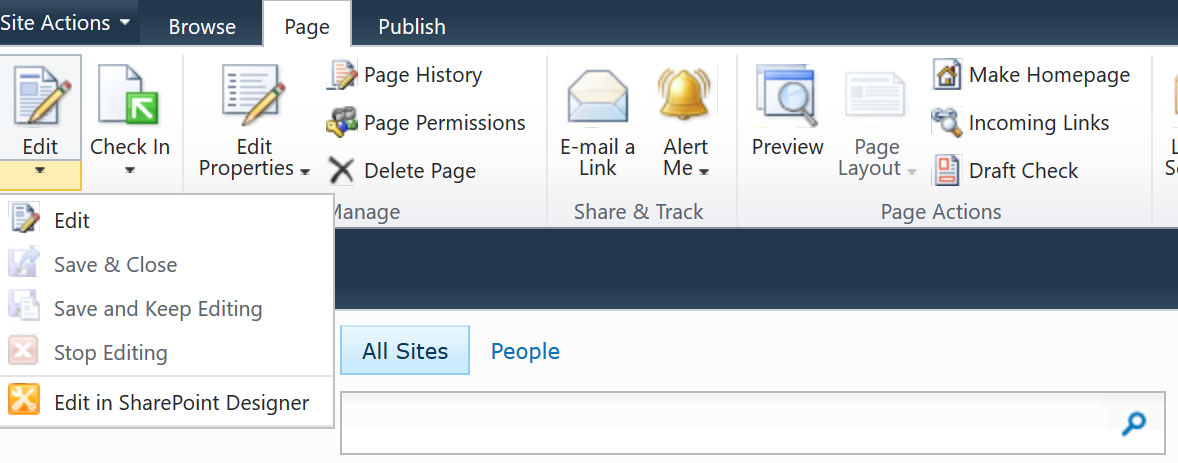
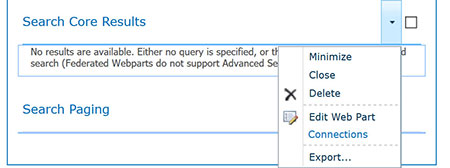
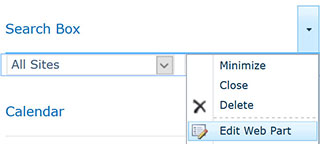
Next up, navigate to your search results page you want to show the tags on.  Click the “Page” tab, and then edit the page. Scroll down to the “Search Core Results” web part, and click “Edit Web Part”.

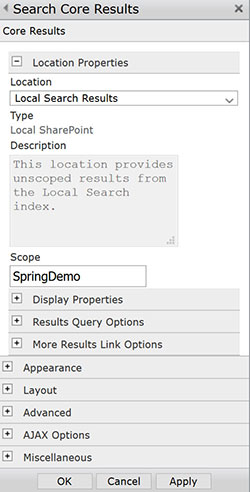
From here, there are two text areas you are going to need to edit.  I STRONGLY RECOMMEND MAKING A BACKUP OF EACH OF THESE BEFORE YOU START EDITING.  Open the “Display Properties”.

The first thing you will do is add a reference to the property for the “Fetched Properties”.  To do so add the following before “</Columns>”

<Column Name="owstaxidtags"/>

Next, you will need to update the XSL for the search core results.  Click the button that says “XSL Editor…”  Copy this text and paste it into a more user friendly editor like Notepad++

There area few areas you will need to make edits for.  First is to set up a parameter for the property.  Find the area at the beginning where there are a bunch of “param name” declarations, and add one for your property:

<xsl:param name="IsSearchServer" />
<xsl:param name="Period" />
<xsl:param name="SearchHelp" />
<xsl:param name="owstaxidtags" /> 
<xsl:param name="Date" />
<xsl:param name="Size" />
<xsl:param name="ViewInBrowser" />

Next, scroll down until you find the “<xsl:template match=”Result”>” area.  Add a local variable for your property:

<xsl:variable name="id" select="id"/>
<xsl:variable name="currentId" select="concat($IdPrefix,$id)"/>
<xsl:variable name="url" select="url"/>
<xsl:variable name="owstaxidtags" select="$owstaxidtags"/>

Next you need to find the area you want to output the tags.  For my purposes, I am going to put it in “<div class=”srch-Metadata2″>”.  You can use the developer tools in your browser to locate the div name that you want to render the text to.

So right underneath the “DisplayDate”, I am going to just make the metadata tags an extra piece of content to display.  Here I am adding two things.  First the label, if it sees that there are any tags, and the second is a reference to the display template, which formats the metadata tags:

<div class="srch-Metadata2">

    <xsl:call-template name="DisplayDate">
        <xsl:with-param name="write" select="write" />
    </xsl:call-template> 

    <xsl:if test="string-length(owstaxidtags) &gt; 0"> 
        <xsl:text> Tags: </xsl:text>
    </xsl:if> 
    <xsl:call-template name="FormatMetadata">
        <xsl:with-param name="owstaxidtags" select="owstaxidtags" />
    </xsl:call-template> 

Then all that is left of the XSL is to add in the display template.  Your mileage may vary on this.  Depending on how SharePoint outputs your tags, you may need to modify these if statements until you get the desired formatting.  Scroll down until you get the area with the other display templates (example: <xsl:template name=”DisplayDate”>)


Then add in the display template:

<xsl:template name="FormatMetadata">
    <xsl:param name="owstaxidtags"/>
    <xsl:if test="string-length($owstaxidtags) > 0">
         <xsl:variable name="nextItem" select= "substring-before(concat($owstaxidtags, '|'), '|')"/>
         <xsl:variable name="remaining" select= "substring-after(concat($owstaxidtags, '|'), '|')"/>
         <xsl:if test="(not(contains($nextItem, '#'))) and (contains($nextItem, ';'))">
             <xsl:variable name="validItem" select= "substring-before(concat($nextItem, ';'), ';')"/>
             <xsl:value-of select="$validItem"/>
             <xsl:if test="contains($remaining, ';')">
                 <xsl:text>, </xsl:text>
             </xsl:if>
        </xsl:if>
        <xsl:if test="(not(contains($nextItem, '#'))) and (not(contains($nextItem, 'GP0'))) and (not(contains($nextItem, ';')))">
            <xsl:value-of select="$nextItem"/>
        </xsl:if> 
        <xsl:call-template name="FormatMetadata">
            <xsl:with-param name="owstaxidtags" select="substring-after($owstaxidtags, '|')"/>
        </xsl:call-template>
    </xsl:if>
</xsl:template>


Once you have made all your edits (be sure to keep that backup handy), paste the new edited XSL changes into the “XSL Editor” for the web part, and click “OK”.  If you get an error, recheck your steps.  If you are not seeing what you expect, you can always output just the raw metadata tag info without using the template by calling it directly in your template:

<xsl:value-of select="$owstaxidtags" />

So that’s it! You should now be seeing your metadata tags in your search results.

Locking Down Search for a Site (Part 1 – SP2010, SP2013*)

One of the SharePoint features that does not always work as expected is the “Search This Site” component.  If one is doing a search using this option, the results page can sometimes get confusing very quickly for unexperienced SharePoint users.  Results are typically presented for the site in question, however the user is then presented with too many options for making ongoing searches.  What is worse, is that if the user alters their search, they may lose the context of searching just that one site, and in turn get results for the entire enterprise instead.

Fortunately, SharePoint has some quite simple options for remedying this.  For SharePoint 2010 & 2013 (in the 2010 UI), there is the Search Scopes option, and in 2013 (UI) onwards there is an option for the customization of the results page, which I will be documenting in a follow-up post to this one.

The first step is it to set up a new scope for the site you wish to limit the results to.  To do so, navigate to the root of the site collection, and click “Site Actions”, then “Site Settings”.  Find the link labeled “Search Scopes”.

Once on the Scopes page, click the “New Scope” link.

Give the new scope a title.  Preferably something short, and with no spaces.  The reason for this is you will need to use this exact title later on.  Unless you need the other options changed for some reason, you can feel free to leave them as is.  The scope will still be available for use, even if the check boxes are not selected.

The next step is to set up some rules for the scope you just created, which will tell the scope which content it should hold.  Look through the scopes on the View Scopes page, until you locate the scope you just created.  Click the “Add Rules” link (you can also click “Edit Properties and Rules” from the drop down if you are going back to change or add more rules).

From here, you will want to set the scope to be just to the site.  Set the URL to the domain, and click OK.

From here, you will want to set up the search results page that you want to use for the site where you will have the limited results.  You have a couple of options here for placement.  You can either add the results page to the root search site, or create a new Search Center and add it as a subsite under the site you are working on.  The reason you may want to set up a new Search Center is for when you want to maintain the same branding presence as the site you are providing results for.

You will want to create a new “results page” in the “Pages” area of the search site. For example, you could add the page to https://company.com/search/Pages/Forms/AllItems.aspx  (Click the “Documents” tab, Click the New Documents drop down, and select “Welcome Page”, then “Search Results Page”)

If using a new search center as a subsite (Site Actions -> Site Settings -> Sites and Workspaces -> Create -> Under the Enterprise tab choose Enterprise Search Center), you could just modify the existing results page: https://company.com/SpringDemo/search/Pages/results.aspx

Once on the results page, click the “Page” tab, and then “Edit”


Now you are ready to plug in the custom scope you created in the prior step.  Scroll down to the Search Core Results web part, and click the “Edit Web Part” option from the drop down.

In the settings area, expand the “Location Properties”, and in the textbox labeled “Scope”, add in the scope name of the scope you created earlier.

Click OK, and then check in and publish the updated results page.

The last step is to wire up a search box to the updated results page.

For this example, we will be wiring up a search box on the home page of the site.

The first thing you may want to do is hide the search bar in the masterpage.

The reason for this is that this search bar is not directly customizable.  The only way around that is to use some custom JavaScript to override the default search destination.  If you are using the default SharePoint masterpage, you can hide it by using a bit of custom CSS ( #s4-searcharea {display:none} ).  You can put that in a .css file, and if you have publishing turned on, add it as a css file to be used for the site.

After completing that optional step, you are finally ready to complete the final step.  Add a “Search Box” web part to where you would like it placed. Then choose “Edit Web Part”

If you want to keep searches limited to just this site, first hide the scopes drop down (default to target results page).

Under the Miscellaneous section, add put in the link to the results page you modified earlier (ie. /SpringDemo/search/Pages/results.aspx)

Last you will want to change the chrome type and title so that people will know what it is for.

Click OK, and stop editing (publish if necessary) the page.  You should be ready to test/go now.


As a last optional step, if you want to put a link on the search results page so that the user can get easily back to the home page, you do that by adding a content editor web part to add a link.

SharePoint Search Box Not Firing When Enter Pressed in IE

Ran into an issue in SP2013/SP2010 where the Enter/Return key would default to other page elements instead of taking the keywords and conducting the search if the Enter key was pressed. So for example, if there was a button on the page, it would fire that element, instead of the search box. Here is a simple bit of jQuery which will ensure that the user’s search gets completed:

//fix for IE 11 Enter/Return key not firing for Search box
jQuery("input[id^=ctl00_PlaceHolderSearchArea]").keypress(function(event){
  if(event.which == 13) 
  {
    window.location = jQuery("a[id^=ctl00_PlaceHolderSearchArea]").attr('href');
   }		        
});

Get Web Sites Owners Listing (Powershell to Text File)

I created this script to gather a listing of web site owners within a Site Collection.  It has been set to only gather the first tier of sites.  If you wish to go deeper, change the comparision.

if ((Get-PSSnapin "Microsoft.SharePoint.PowerShell" -ErrorAction SilentlyContinue) -eq $null) {
    Add-PSSnapin "Microsoft.SharePoint.PowerShell"
}
function IterateSubSites ([Microsoft.SPWeb]$subSite)
{
    if ($subSite -ne $null)
    {
        if($subSite.Webs -ne $null)
        {
            foreach($subsites in $subSite.Webs)
            {
                IterateSubSites($subsites)
            }
        }
    }
}
 
$webApplicationURL = "http://contoso.com"
$webApp = Get-SPWebApplication $webApplicationURL
 
foreach($site in $webApp.Sites)
{
    foreach($subWeb in $site.AllWebs)
    {
       if(($subWeb.Url.Split("/") | measure-object).Count -lt 5)
{
        $output += $subWeb.Url + "`r`n`r`n"
        foreach($group in $subWeb.Groups)
        {
            if($group.Name -like "*Owners*")
            {
                $output += "Owner(s): " + "`r`n`r`n"
                foreach($user in $group.Users)
                {$output += $user.Name + " - " + $user.Email + "`r`n`r`n"; }
            }
        }
}
    }
    if($subWeb.IsRootWeb -ne $true)
    {
        IterateSubSites($subWeb)
    }
    $subWeb.Dispose()
}
$site.Dispose()
$output | Out-File "C:\owners.txt" 

Automatically Filing SharePoint Documents After Timespan

1) Set up a Document Library that will house the “temporary” documents (ie. the documents that you plan on having automatically filed).  For instance “New Documents.”

2) Then set up a separate “Custom” list that you will use as your routing list.  In this list enter all the names of the various other document libraries that you want to file your documents to.  For instance “Tax Records” and “Property Records.”

createcustomlist

3) Go back to your “New Documents” library that you just created, and add a new column under “Document Library Settings.”  Give it a content type of “Lookup”, and tie it to the list you created in step 2.  Call it “Filing Location.”  *This can also be done with metadata if you have it enabled.

createlookupcolumn

4) Now that you have your infrastructure set up, it is time to create a workflow to automatically file the documents.  Open SharePoint Designer, and browse to your site. Choose to create a new workflow.

5) Link the workflow to your “New Documents” library.  Choose to activate the workflow whenever a new item is added. Enter the workflow steps in the following format:

  • Choosing to examine the “Filing Location” column.
  • If it matches one of the types you identify, choose to pause it for the time you desire to have it displayed in the “New Documents” library.  In this case, I will choose 5 days.
  • Then have the workflow copy the document (“Current Item”) to the desired matching document library.

filingworkflow

6) Repeat the previous step as many times as is necessary for the different document libraries you wish to file your documents to.

7) Finally, for the last step, choose to examine the file, and then pause it for a time period greater than the time you chose for step 5. Then add an instruction to delete the item after that time has passed.

deletionworkflowstep

8) Save the workflow.

9) Now when you add documents to the “New Documents” folder, they will be automatically filed.  However, when you upload them, you will also need to choose where they get filed under the “Filing Locations.”


How To Create A “Private” SharePoint Discussion Board

One of the requests I hear most from users is for the ability to create a private discussion board on their site.  They have a general user base, but want to lock down a particular SharePoint discussion board to just a small subset of users.  Unfortunately, there is no really obvious way to do this, so creating a “private” discussion board is a multi-step process.


The benefits to creating a private discussion board are numerous.  It can allow you to have a central location for having secure communication between team members, as well as provide the ability to share documents, all while remaining within the context of a parent site.  Typically, site admins would prefer to keep users on a single site, rather than go off and create subsites for all the different user sub-groups that want their own private area.  Private discussion boards are a great option for this.

To help those that might want to create one on their site, but not know where to start, I put together this little guide to help you create one.  While these screenshots are for SharePoint 2010, the same steps will also apply to SharePoint 2013, since the discussions list has remained essentially unchanged.

1) Go To “Site Actions”, click on “More Options…” You can also get to this menu by clicking “Create” when on the “Discussions” tab.
step1

2) Choose “Discussion Board” as the type. If you do not wish to have this on the navigation, do NOT click “OK” just yet.

step2

3) (optional) Click “More Options”. Enter the name of the private board. For Navigation, choose “No.” Then click OK.

step3

4) Once the board is created, you will need to modify the permissions to make it a private board. Click on “List Permissions.”

step4

5) THIS IS THE MOST IMPORTANT PART. **** DO NOT CLICK MANAGE PARENT **** If you change the permissions of the parent, you will mess up the permissions for the entire website.

Instead, click on “Stop Inheriting Permissions”

step5

6) Remove all the groups and users, except for the “Owners” group for the website. Click OK.

step6

7) Go to “Site Actions”, “Site Permissions”

step7

8) Create a new group for the private board (this step may be unnecessary if you already have a SharePoint group you wish to use)

step8

9) Give the group a name and set it to “Read Only”. *This does not mean it will be Read Only for the discussion board, it means it is a read only group for the site. If they have permissions that are elevated for the site, those will be taken care of by another group they are a member of. This group is just for the private board.

step9

10) Click “Create.” Once you complete this step, add the users or AD groups to the SharePoint group that need permission.

step10
11) Click “Site Actions”, “View All Site Content”

12) Click on the private discussion board you just created

step12

13) Click “List Permissions” and then “Grant Permissions”

step13
14) Use the people picker to find the group that you just created.

step14

15) Set the permission for the group as they relate to the private board. Typically “Contribute”, if it is an admin group set it to “Full Control”

step15

16) Verify the permissions

step16
17) Next we want to add a link to the private board. Go to “Site Actions” click on “Site Settings”

step17
18) Click on “Navigation”

step18
19) If you have a private discussions tab, click that, then click “Add Link”

step19
20) Give it a title and browse for the private board to create the link.

step20

22) Click OK, and check to see if the link appears.

23) (optional) Finally, if you created a group at the beginning, go into the group and add the members you want to grant access.  Click “Site Settings”, “Site Permissions”, and add users to the group.


Moving the Search Service Application to a Different Farm Server

For performance reasons, you may wish to move the Search Service Application in SharePoint 2013 to a different farm server. After adding the server to the farm, and provisioning the Search Service, in order to move the service, you will need to do so through Powershell, as that is the only way to get the components moved over.

Rather than breaking up the SSA components onto multiple servers, to reduce lag, etc. between servers, its suggested to keep the components together on the same server.

before-moving-ssa

So for instance, you may have Central Admin running on Server A, along with the User Sync and Search. To reduce the load on Server A, you may want to move the entire search portion over to Server B.

To do so, run the following commands:

$ssa = Get-SPEnterpriseSearchServiceApplication
$active = Get-SPEnterpriseSearchTopology -SearchApplication $ssa -Active
$clone = New-SPEnterpriseSearchTopology -SearchApplication $ssa -Clone –SearchTopology $active
$newSrv = Get-SPEnterpriseSearchServiceInstance -Identity <<Server B Name>>
New-SPEnterpriseSearchQueryProcessingComponent -SearchTopology $clone -SearchServiceInstance $newSrv
New-SPEnterpriseSearchAnalyticsProcessingComponent -SearchTopology $clone -SearchServiceInstance $newSrv
New-SPEnterpriseSearchContentProcessingComponent -SearchTopology $clone -SearchServiceInstance $newSrv
New-SPEnterpriseSearchCrawlComponent -SearchTopology $clone -SearchServiceInstance $newSrv
New-SPEnterpriseSearchAdminComponent -SearchTopology $clone -SearchServiceInstance $newSrv
New-SPEnterpriseSearchIndexComponent –SearchTopology $clone -SearchServiceInstance $newSrv -IndexPartition 0
Start-SPEnterpriseSearchServiceInstance -Identity $newSrv
Set-SPEnterpriseSearchTopology -Identity $clone

Next, you will need to re-clone it again to remove the old components off the old server

$ssa = Get-SPEnterpriseSearchServiceApplication
$active = Get-SPEnterpriseSearchTopology -SearchApplication $ssa -Active
$clone = New-SPEnterpriseSearchTopology -SearchApplication $ssa -Clone –SearchTopology $active

Run the following, this will give you a list of all the component IDs you will need to remove them from Server A

Get-SPEnterpriseSearchComponent -SearchTopology $clone

Replace the IDs in the following commands:

Remove-SPEnterpriseSearchComponent -Identity <<Server A Component ID>> -SearchTopology $clone -confirm:$false
Set-SPEnterpriseSearchTopology -Identity $clone

Run a refresh in central admin, and you should see the following:

after-moving-ssa

Using CQWP To Show Discussion Rollup with Reply Count and Last Update Date

This is what we want our final result to look like:

DiscussionRollupFinal

1) Add a Content Query Web Part to your page.  Go in and expand the “Query” section.  Modify it to show just the discussions for your site.  Then click OK.  Verify that you can see your discussions.

DiscussionRollupStep1

2) This is where things get a little tricky.  You will need to access the ItemStyle.xsl file of your site, and modify it by adding a new template within the file.  Just find a spot where the templates are within that file and copy and paste the following template entry (be sure to keep what you already have in that file):

<xsl:template name="DiscussionAndReplies" match="Row[@Style='DiscussionAndReplies']" mode="itemstyle">
 <xsl:variable name="vv1"> 
 <xsl:value-of select="@LinkUrl"/> 
 </xsl:variable>
 <xsl:variable name="formattedLastUpdatedDate">
 <xsl:value-of select="ddwrt:FormatDateTime(string(@DiscussionLastUpdated) ,1033 ,'dd MMM yyyy')" />
 </xsl:variable>
 <xsl:variable name="listTitleEnd">
 <xsl:call-template name="substring-before-last">
 <xsl:with-param name="list" select="@LinkUrl" />
 <xsl:with-param name="delimiter" select="'/'" />
 </xsl:call-template>
 </xsl:variable>
 <xsl:variable name="listTitle">
 <xsl:call-template name="substring-after-last">
 <xsl:with-param name="string" select="$listTitleEnd" />
 <xsl:with-param name="delimiter" select="'/'" />
 </xsl:call-template>
 </xsl:variable>
 <xsl:variable name="DisplayTitle">
 <xsl:call-template name="OuterTemplate.GetTitle">
 <xsl:with-param name="Title" select="@Title"/>
 <xsl:with-param name="UrlColumnName" select="'LinkUrl'"/>
 </xsl:call-template>
 </xsl:variable>
 <xsl:variable name="LinkTarget">
 <xsl:if test="@OpenInNewWindow = 'True'" >_blank</xsl:if>
 </xsl:variable>
 <div class="item link-item">
 <a href="{$vv1}" target="{$LinkTarget}" title="{@LinkToolTip}"> 
 [<xsl:value-of select="$listTitle" />] <xsl:value-of select="$DisplayTitle"/> - Replies:(<xsl:value-of select="substring-after(@ItemChildCount,'#') "/>) - Last updated: <xsl:value-of select="$formattedLastUpdatedDate" />
 </a>
 </div>
</xsl:template>

3) Once you’ve done that, go back and edit your Content Query Web Part.  Now, scroll down to “Presentation” and expand it.  Be sure to select the sorting / counts you’d like displayed.  Then be sure to select your new style template you just added.

DiscussionRollupStep2

5) If you are using SharePoint 2013, you will want to make sure you add the entry for the ItemChildCount, as it will not be picked up automatically.  (I spent a good couple hours trying to figure out why it would display in SP2010 and not SP2013.)

DiscussionRollupStep3

6) Click ok, and voila!  A nice rollup of a more detailed view of the discussion content on your site.

DiscussionRollupFinal

Modify “Upload To” (“Destination Library”) Choices For Discussions

I will start out with a caveat by saying that I have not tried this script on 2013.  However, the “Upload file” dialog also has an iframe like 2010, so I believe it should work, or will work with some minor alterations.

The problem we had is that users have permissions to contribute to multiple document libraries, however, for a specific discussion board, we wish to have them upload their attachments (when not using the “Attach File” option, but rather the “Upload file” option), to a specific document library.  The beauty of having the users create their posts using this method is that it allows the content to be directly embedded in the post itself, rather than having to click on the “View Properties” link to get to the attachment.

doc-libraries

SharePoint however, does not present a way to modify the list of upload locations it presents.  Whilst browsing the interwebs, I did find ways that recommend modifying the underlying aspx pages, however, trying to adhere to what Microsoft recommends, I never modify these pages unless it has been recommended.

upload-embed-attachment

Undesired choice appears in “Upload Document” select box:

upload-location-choices

Find the value of the option we wish to remove:

find-choice-to-remove
Add the following script to your masterpage. This assumes you already have a reference to jQuery lying around. You may need to update the “live” reference to “on” if you have a new version.

//for removing the load detecting

var hideRibbonTimeout = 0;

var newButtonPresent = false;


//check to see if this the discussion board we want to trim

if (jQuery('#s4-titlerow a:contains(Product)').length > 0) {

       setTimeout(HideRibbonButton, 10);

}

//replace the current "Upload File" button to override the SharePoint button

function HideRibbonButton() {

       $('a[id*="UploadFile-Large"]').replaceWith('<a class="ms-cui-ctl-large newDialog" id="btnUpload" aria-describedby="Ribbon.EditingTools.CPInsert.Links.UploadFile_ToolTip" mscui:controltype="Button" role="button" id="Ribbon.EditingTools.CPInsert.Links.UploadFile-Large"><span unselectable="on" class="ms-cui-ctl-largeIconContainer"><span unselectable="on" class=" ms-cui-img-32by32 ms-cui-img-cont-float"><img unselectable="on" alt="" src="/_layouts/1033/images/formatmap32x32.png" style="top:-224px; left: -64px;"></span></span><span unselectable="on" class="ms-cui-ctl-largelabel">Upload<br>File</span></a>');

       if (jQuery('.newDialog').length> 0) {

              newButtonPresent = true;

       }

       hideRibbonTimeout++;

       if (hideRibbonTimeout < 1000) {

              if (newButtonPresent == false{

                     setTimeout(HideRibbonButton, 10);

              }

       }

}

//handle the "Upload File" click and create our own upload

$('#btnUpload').live('click'function () {

       newButtonPresent = true;

       SP.UI.ModalDialog.showModalDialog({

              url: L_Menu_BaseUrl + "/_layouts/RteUploadDialog.aspx?LCID=1033&Dialog=UploadDocument&UseDivDialog=true",

              title: "Upload a file",

              dialogReturnValueCallback: function (result, value) {

                     if (result == SP.UI.DialogResult.OK) {

                           //adds the link to the body of the discussion post

                           $('.ms-rtestate-write').append($(value));

                     }

              }

       });

       setTimeout(function () {         

       //finds the upload choice dialog box

              var dlg = SP.UI.ModalDialog.get_childDialog();

              if (dlg != null) {

                     var dlgWin = $("html"window.parent.document);

                     //get the iframe with the select box

                     var dlgCont = $(dlgWin).find("#dialogTitleSpan:contains('Upload a file')").parent().parent().parent().find('iframe');

                     //remove the option we want taken out

                     $(dlgCont).contents().find("#ctl00_PlaceHolderRteDialogBody_TargetList option[value='3141e042-d74f-440d-b836-a82b79a576f5']").hide();

              }

       }, 1000);

});


Upload choice has been removed and users are now directed to upload to the correct document library.

choice-removed