Here is the list of SharePoint 2010 Service Application databases that can be upgraded to 2013:
- Business Connectivity Service
- Managed Metadata
- Performance Point
- Secure Store
- User Profile Service
- Search
Here is the list of SharePoint 2010 Service Application databases that can be upgraded to 2013:
When trying to set up a datasource in SharePoint 2013 with Reporting Services Integration, if you want to pass through the user’s identity to the report, you will get an error if you try to use the “Windows authentication (integrated) or SharePoint User”. This is because SharePoint does not allow for SAML / ADFS auth to go through using the build in C2WTS.
Can not convert claims identity to windows token. This may be due to user not
 logging in using windows credentials.
 There is a workaround for this that does not require any extra programming, however, it may be an inconvenience to your users. Set the mode as “Prompt for credentials” and then check the “Use as windows credentials” checkbox.

This will allow reporting services to connect to the datasource using the users’ Windows auth account, and allow the report to run. The downside is they will have to enter their user name and password whenever they want to run the report.

Success!

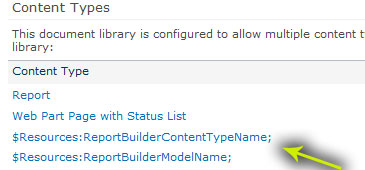
If you have upgraded from SharePoint 2010 to 2013, and find that the Content Type titles look a bit odd for Reporting Services content types, you may want to change those to something more familiar. There is a relatively simple fix.
For example, they appear as:
$Resources:ReportServerContentTypeGroup; |
||
| $Resources:DataSourceContentTypeName; | Document | Home |
| $Resources:ReportBuilderContentTypeName; | Document | Home |
| $Resources:ReportBuilderModelName; | Document | Home |
Correct display:
Report Server Content Types |
||
| Report Builder Model | Document | Home |
| Report Builder Report | Document | Home |
| Report Data Source | Document | Home |
So for example, when to create a new report library, and you start adding content types for your reports, you may see something like this:
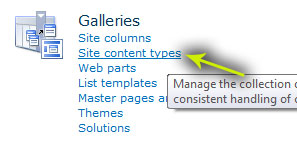
To fix this, go to “Site Actions”, “Site Settings.” Click on “Site Content Types.”
Click on the content type you need to update, and then click on “Name, description, and group”

Change the title text for the three content types, and give it a group. For instance:
Report Data Source
Report Builder Model
Report Builder Report
Group: Reporting Services

Once you have done that, go back into your library, and delete out the previous content types, and re-add them.

You should then get the correct names displayed when you need to add a new reporting file.

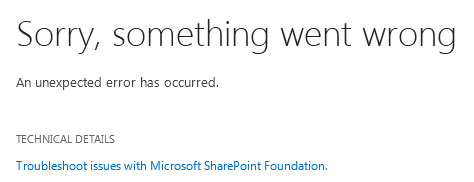
While trying to set up Reporting Services for SharePoint 2013, I ran into a “Something went wrong” message in Reporting Services.
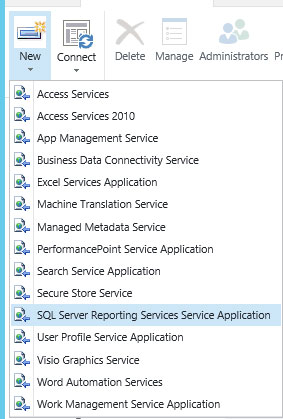
The confusing part is that I was able to provision SQL Server Reporting Services, both verifying that the service was indeed “STARTED” and that I had successfully created a service application and proxy using the GUI from Central Admin.
![]()

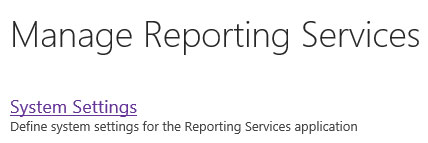
Clicking on the application (“Reporting Services”) brought me to the configuration area, however, when I went in to set it up, I received an error message stating: “Sorry, something went wrong”.
This left me scratching my head. I determined that the SQL 2012 feature: “Reporting Services – SharePoint” must not have been successfully installed.
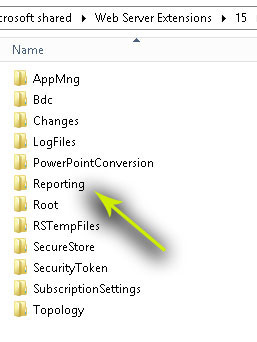
To check this, you will want to go to C:\Program Files\Common Files\microsoft shared\Web Server Extensions\15\WebServices. Once here, look for the “Reporting” folder.

As you can see, there is no “Reporting” folder. It is missing entirely. To remedy this, I first attempted to install the feature via my SSRS 2012 SP1 installation disc.

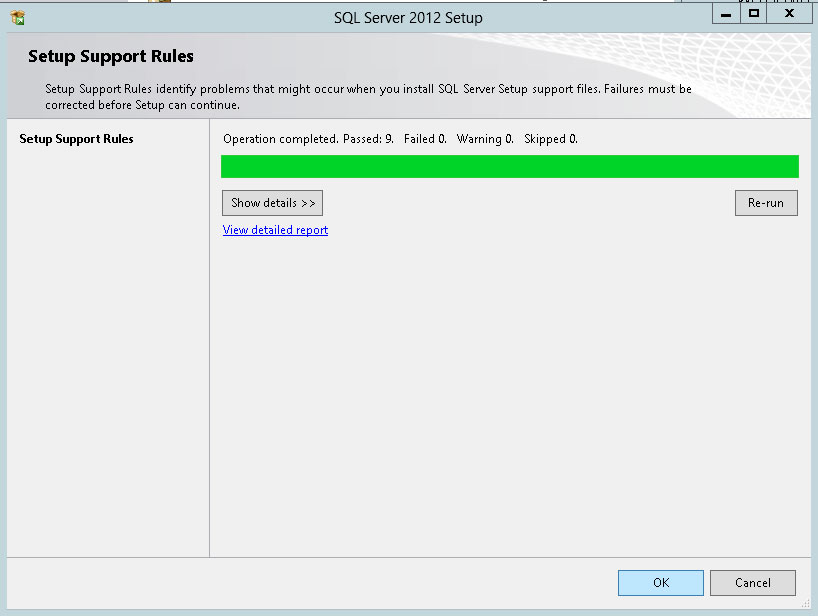


However, when I got the step that would allow me to install the feature, it indicated it had already been installed.

Thus I thought the solution was to re-install it, but this was as far as the SQL 2012 SP1 disc would take me in terms of reinstalling. To get around this, I first attempted to uninstall the feature through Control Panel / Programs. However, that gave me an error message : ‘Install-SPRSServiceInstall-SPRSService’ is not recognized, when I got to the final uninstall step.
I unprovisioned the service application in Central Admin, and STOPPED the service on the server, and tried again. No luck.
Also , attempting to uninstall the application through Powershell yielded the same “not recognized” results using the following uninstall commands:
Install-SPRSService -uninstall
Install-SPRSServiceProxy -uninstall
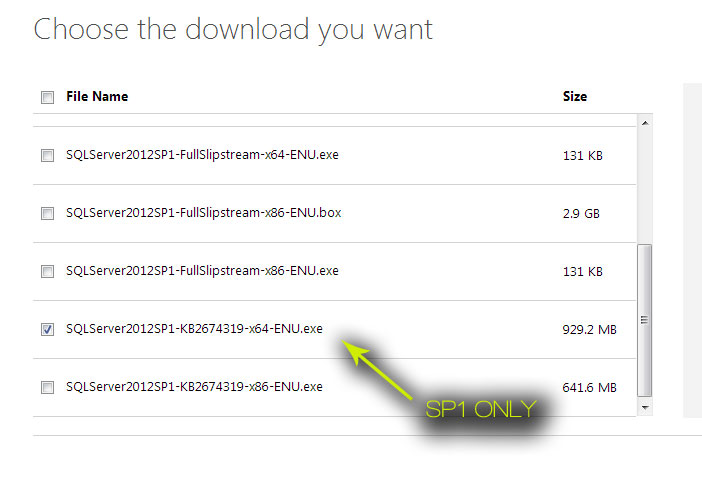
Finally, I discovered a solution. It turns out that the full installation disc for SQL 2012 SP1 apparently was not sufficient. Instead, just the SP1 exe need to be installed on top of what is already there, not the full install of SQL 2012 SP1, but just the SP1 bits.
Download it here: http://www.microsoft.com/en-us/download/details.aspx?id=35575
Be sure to choose the correct download, and not the full version.
After grabbing this, run the install.

Verify that that “Reporting” folder is now present.
Finally, you can provision your services:
Install-SPRSService
Install-SPRSServiceProxy
get-spserviceinstance -all |where {$_.TypeName -like "SQL Server Reporting*"} | Start-SPServiceInstance
![]()
Then click on “System Settings” in your app.
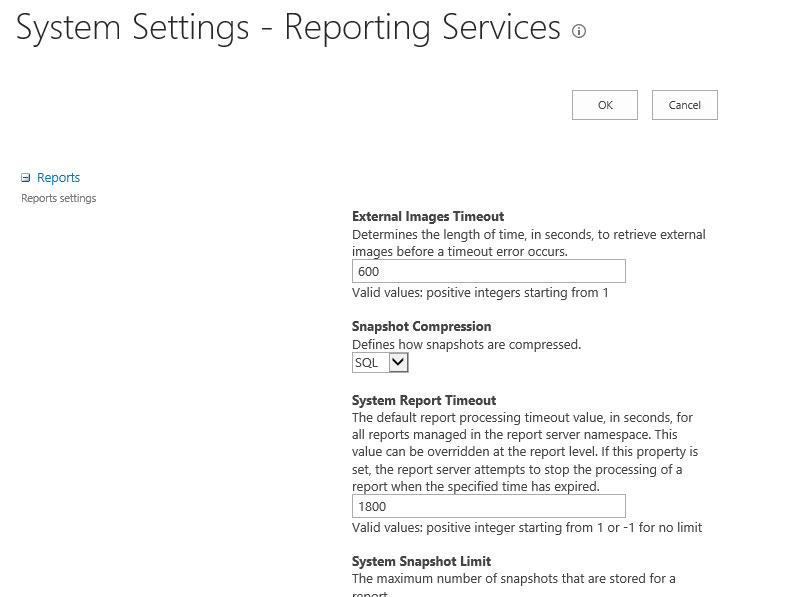
Success!!!
Using the steps outlined in my previous post for the AppFabricCachingService, I was able to get the service up for the server that had going into status: “UNKNOWN.”
However, it would stay up for a few minutes, and then revert “DOWN.” I had to constantly go into “Services” and reset the “AppFabric Caching Service” to “Automatic” and then try running “Start-CacheHost” or “Start-CacheCluster” again.
This had a repetitive effect. Finally, I tried doing the following, and I was able to get the server that had kept reverting to “DOWN” to stay “UP”, and the “AppFabric Caching Service” to stop switching to “Disabled.”
First, log into one of the working (“UP”) cache cluster servers, and fire up Powershell:
Use-CacheCluster
(May be unnecessary, but good to double check this)
Export-CacheClusterConfig c:\clusterconfig.xml
Copy the file over to the server that was reverting to “DOWN” and open it up in Notepad. (You may need to open Notepad as an admin depending on your UAC settings).
Replace : dataCache size=”Medium” with dataCache size=”Small”
Also replace: caches partitionCount=”256″ with caches partitionCount=”32″
Then save the file.
Fire up Powershell on the “DOWN” server and type:
Stop-CacheCluster
Import-CacheClusterConfig c:\clusterconfig.xml
Start-CacheCluster
Give it some time, and if necessary, type the following to check the status:
Get-CacheHost
For me, this brought all my servers to the status of “UP” and they stayed there.
One of the benefits of SharePoint 2013 is its ability to scale property for use in a multitenant environment. In addition to having isolated webs, it also provides for isolation within service applications. This means, that for instance, Company A can have a web that provides search results that are completely isolated from Company B. Of those that can be partitioned, some of the most important are the BDC, Search, Managed MetaData and the Secure Store. Here are the SharePoint 2013 Service Applications that can be partitioned.
The key way SharePoint takes advantage of multi-tenancy capabilities is through Site Subscriptions. Site subscriptions allow grouping of Site Collections of the same Web Application to consume the same features and service information. The key thing to remember is that a site can only have one subscription at a time, and that it has to be managed through powershell. Once a subscription is set up the service application can be partitioned.
$subscription = New-SPSiteSubscription
Set-SPSite -Identity http:// mydomain.com/sites/billing  -SiteSubscription $subscription
When creating your service application, such as search, add:
-Partitioned
After migrating “My Sites” from SharePoint 2010 to SharePoint 2013, I wanted to convert the My Sites to claims and then move it over to ADFS 2.0 authentication. I had no issues with migrating other SP2010 sites to SP13 ADFS claims. After going through the process for My Sites, I was able to use Chrome and sign into the main site, and then clicking on the “My Site” link will took me to my correct migrated My Site / Profile by logging me in through ADFS.
In IE, however, this was a completely different story. I could sign into the main site with ADFS just fine. However, clicking on “My Site”, or navigating there directly took me straight in without ever prompting me to log in via ADFS. It was defaulting to Windows Auth, even though I had turned off NTLM, and it created a NEW profile for me using my Windows credentials instead of using my existing claims based profile.
Even toggling off “Enable Windows Authentication” in Central Admin under “Authentication Providers” did not stop this from happening. Windows Auth continued to persist even after disabling this.

It turns out the issue was on the client side (IE), which was to be expected. The first thing I did was disable all the “Trusted Sites” and “Local Intranet” settings in IE, also turning off “Enable Integrated Windows Authentication”. This however left me with a windows login prompt.

Finally, as a last attempt, I cleared out my cache in IE. That did the trick. Apparently an old cookie was somehow getting picked up and prompting me for Windows Auth instead of the desired ADFS auth.
I ran into a bit of an issue where one of our SharePoint 2013 farm servers was acting unusual when it came to the AppFabricCachingService. When logging in, we were getting some errors, which showed up in the logs as being related to the cache. If you are having similar issues, you may want to try some of the following steps:
First, verify that it is showing as “Started” in Central Admin on the offending server under “Services on Server”. If you are having trouble starting it, as I have occasionally experienced in Central Admin, try manually starting “AppFabric Caching Service” under “Administrative Tools”, “Services.” Then run :
The issue I ran into was when running “Get-CacheHost”, it a returned status of “Unknown” for one of the servers.

As first course, reprovisioning the service is a good start. I verified that the service was indeed running on the server in Central Admin, and the ran the following PowerShell on the troublesome server:
Remove-SPDistributedCacheServiceInstance

$instanceName ="SPDistributedCacheService Name=AppFabricCachingService"

$serviceInstance = Get-SPServiceInstance | ? {($_.service.tostring())
-eq $instanceName -and ($_.server.name) -eq $env:computername}

$serviceInstance.delete()

Add-SPDistributedCacheServiceInstance

Use-CacheCluster

Get-CacheHost
If you run this on the local server, and it is still showing as “Unknown” when running “Get-CacheHost”, you may need to run:
Start-CacheHost
It will prompt you to enter the name of your server, and the port. After this, check your work by running Get-CacheHost again.
Running this indicated that all the services were “UP” across our servers, but this was when running Get-CacheHost on the troublesome server. When running Get-CacheHost on the other servers, we still got indications of status “Unknown”.
This left me to think that perhaps the problem was not related to the service itself. Sure enough, when attempting to ping the troublesome server from one of the other servers, I received a “Request timed out” message.
I went into Windows Firewall and changed the settings to match the incoming settings of those on the other servers that were not having an issue. I attempted to reprovision the service again after that, and it began to work.

Another problem I discovered that can occur in situations like this is if the time on the servers gets out of sync. This can also cause issues with the cache. What you will want to do in this scenario is navigate to “Services” on the offending server, and restart “Windows Time.”
Another useful setting I found was to make all the hosts have the same size cache. If you find one of them is not set to the same size as the other run (changing the CacheSize accordingly):
Stop-CacheCluster
Set-CacheHostConfig -CacheSize 1000 -HostName server1 -CachePort 22233
If you receive “Specified host is not present in cluster” when attempting to get the service up and running, you may want to run the following scripts:
First, check to see if it returns a correct entry.
Get-CacheHostConfig –ComputerName server1.contoso.com -CachePort 22233
That will give you the details for the servers cluster information, which should look like:
HostName : server1.contoso.com
ClusterPort : 22234
CachePort : 22233
ArbitrationPort : 22235
ReplicationPort : 22236
Size : 1229 MB
ServiceName : AppFabricCachingService
HighWatermark : 99%
LowWatermark : 90%
IsLeadHost : True
If it does not, and you get an error of “Specified host is not present in cluster.” Then try the following script:
Register-CacheHost –Provider [provider] –ConnectionString [connectionString]
-Account "NT AuthorityNetwork Service" -CachePort 22233 -ClusterPort 22234 -ArbitrationPort 22235
-ReplicationPort 22236 –HostName [serverName]
For “provider” and “connectionString” check the DistributedCacheService.exe.config , under “C:\Program Files\AppFabric 1.1 for Windows Server”, which will look like:
<clusterConfig provider=”SPDistributedCacheClusterProvider” connectionString=”Data Source=sql.contoso.com;Initial Catalog=SharePoint_Config;Integrated Security=True;Enlist=False” />
Finally, if you are still experiencing issues getting the server to start, you may want to try restarting the Cache Cluster:
Restart-CacheCluster
Finally, if you are still having issues, I would heartily recommend this post, as it is the most useful one I have run across: http://mmman.itgroove.net/2013/07/fixing-the-appfabric-cache-cluster-in-sharepoint-2013/
Here is a useful video for getting oriented with the cache service:
There seems to be a lack of information out there regarding upgrading SharePoint 2010 My Sites to SharePoint 2013.
If you try to do a straight “Mount-SPContentDatabase” to a new web application. This will work partially, as you will be able to get to your “My Site”, however, when trying to go into “Site Settings” or “Site Permissions”, you will get a “404 – File Not Found” for a lot of the back-end system files.
The best way I have found is to set up the My Site Host first in SharePoint 2013, and then run a Mount-SPContentDatabase on your old SharePoint 2010 My Sites database.
1. Backup your WSS_Content_UserSites
2. Restore it to your SharePoint 2013 SQL as a new database
3. In Central Admin, go to “Application Management”, “Manage Web Applications”, choose “New”

4. Once the site is created, choose to “Create a new site collection”, and select the “Enterprise” tab, and “My Site Host” as the type.
5. Once the My Site Host is created, you can attach your 2010 My Sites database:
Mount-SPContentDatabase -Name WSS_Content_UserSites -WebApplication https://mysites.contoso.com
6. Finally, go into your User Profile Service (Application Management -> Manage Service Applications -> User Profile Service). Click on “Setup My Sites”
7. Enter your My Site Host in the area provided, and don’t forget to add the appropriate groups to “Read Permission Level”
If you accidentally delete or overwrite your “local” SharePoint certificate, you may find random things breaking such as Visio or Excel web parts, or things that require authentication.
You can check to see what certificate you have installed, and see if this might be the case by typing the following in Powershell:
Get-SPTrustedRootAuthority
Examine the “local” entry. If it does not say “SharePoint Root Authority” for the certificate, you will need to fix this. It should look something like this if it is correct:

If your cert does not look like the one above, and you have a multi-server farm, you should still be in luck. Log on to one of the other servers, and fire up SharePoint Management Shell.
Type the following:
$localCert = (Get-SPCertificateAuthority).RootCertificate$localCert.Export("Cert") | Set-Content "C:\localCert.cer" -Encoding byte
Get-SPTrustedRootAuthority
$localCert = New-Object System.Security.Cryptography.X509Certificates.X509Certificate2("c:\localCert.cer")
Set-SPTrustedRootAuthority -Identity "3e20f374-6d2e-4115-bbb8-40d9dd803d5d" -Certificate $localCert
Get-SPTrustedRootAuthority