Hide “Experience All SharePoint 2013 Has To Offer” (Pink Bar)

Experience_all_Sharepoint_Has_To_Offer
If you are upgrading to SharePoint 2013, and not quite ready to upgrade the UI, you may want to hide this rather annoying popup bar, since it will continue to appear, even after you dismiss it.  A good example would be if  you want the stability of SP13 and access to the new Service Application infrastructure.

A simple way to dismiss this message is via PowerShell (SP13 Management Shell).  This command will hide the message for 1 year.  You can adjust the date range as desired:

Get-SPWebApplication http://portal.contoso.com | % { $_.UpgradeReminderDelay = 365; $_.Update() }

Or alternatively, to hide it entirely right out of the gates for all applications:

Get-SPWebApplication | % { $_.UpgradeReminderDelay = 365; $_.Update() }
Get-SPSite -Limit All -CompatibilityLevel 14 | % { $_.ExtendUpgradeReminderDate() }

SharePoint On Premises vs. SharePoint Online (Office 365)

Listing of notable limitations of SharePoint Online for Enterprise

Sites Types

  • Single public facing site
  • Multiple internal/private sites (top level is a Team Site).
    *There are no web applications.  All sites must exist under a single web application using separate site collections

Data Storage Limitations

  • Tenant storage: 10 GB + 500 MB per subscribed user + additional storage purchased.  For example, if you have 10,000 users, the base storage allocation is approximately 5 Terabytes (10 GB + 500 MB * 10,000 users).
  • Site collection: Hard limit of 100GB
  • Overall subscription limit: 25TB

External Users

Per MS: “An external user is a person who has been granted access to your SharePoint Online site, but who is not a licensed user within your organization. External users are users who are not employees, contractors, or onsite agents for either you or your affiliates.”

  • Maximum number of external users: 10,000
  • External users cannot create their own My Sites or OneDrive Pro
  • Cannot change their profile, edit picture or see tasks
  • Cannot be an administrator for a site collection
  • Cannot access search center or execute searches against “everything”

Missing Features/Services in SharePoint Online (365)

Missing: Central Administration

Does not exist in SharePoint Online (SPO), rather there is an “SharePoint Admin Center”

Office365-SharePoint-Admin-Center

Missing: Web Application Management / Managed Paths

  • Starts at the Site Collection level
  • All sites, other than the public and top level team site, must exist under the “.sharepoint.com/sites/” area

Office-365-Managed-Paths-Options

Missing: Full Trust Solutions

You can only create Sandbox and App model solutions.  3rd party solutions would need to be in this format.

Missing: Search Control and Index

  • Unable to set crawl schedules
  • Unable to initiate crawl (default is ~5 minutes)
  • Unable to create custom solutions against Search Index
  • Unable to add entity extraction (custom refiners)
  • Unable to enhance relevancy (custom ranking models)
  • No federated search

Missing: Cross site publishing

Per MS: “Cross-site publishing is a new publishing method that lets you create and maintain content in one or more authoring site collections and publish this content in one or more publishing site collections by using Search Web Parts. Cross-site publishing complements the already existing publishing method, author-in-place, where you use a single site collection to author content and make it available to readers of your site.”

Missing: Content by search

(Content by search allows content to be displayed in a web part via search.  One of the top features of SP13.)

Unavailable SharePoint Services

  • Access Services 2010
  • PerformancePoint Service
  • PowerPoint Automation Service
  • State Service
  • User and Health Data Collection Service*
    *(Office 365 provides separate health info in admin center)
  • Word Automation Service
  • Work Management Service
  • Microsoft Foundation Subscription Settings Service

Branding Limitations

Adding a custom design to the internal site “Team Site” is a bit counter intuitive.  The option to select a MasterPage is not available under “Site Settings.”  You must upload the MasterPage to the MasterPage gallery, along with a “Preview” file.  Then, you must create a “Composed” look.  From there it will be available under the “Change the Look” feature.  I hope to detail this out more in a future post.

Other Notable Limitations

  • Migration must be done remotely
  • Disks cannot be shipped
  • Cannot control upgrade schedule
  • BCS security concerns about opening local data up to the cloud

A detailed feature comparison from Microsoft:

http://technet.microsoft.com/en-us/library/jj819267.aspx

Another consideration: hybrid environment

http://technet.microsoft.com/en-us/library/jj838715.aspx

Another consideration: Azure hosted

http://msdn.microsoft.com/en-us/library/windowsazure/dn275958.aspx

Modify “Upload To” (“Destination Library”) Choices For Discussions

I will start out with a caveat by saying that I have not tried this script on 2013.  However, the “Upload file” dialog also has an iframe like 2010, so I believe it should work, or will work with some minor alterations.

The problem we had is that users have permissions to contribute to multiple document libraries, however, for a specific discussion board, we wish to have them upload their attachments (when not using the “Attach File” option, but rather the “Upload file” option), to a specific document library.  The beauty of having the users create their posts using this method is that it allows the content to be directly embedded in the post itself, rather than having to click on the “View Properties” link to get to the attachment.

doc-libraries

SharePoint however, does not present a way to modify the list of upload locations it presents.  Whilst browsing the interwebs, I did find ways that recommend modifying the underlying aspx pages, however, trying to adhere to what Microsoft recommends, I never modify these pages unless it has been recommended.

upload-embed-attachment

Undesired choice appears in “Upload Document” select box:

upload-location-choices

Find the value of the option we wish to remove:

find-choice-to-remove
Add the following script to your masterpage. This assumes you already have a reference to jQuery lying around. You may need to update the “live” reference to “on” if you have a new version.

//for removing the load detecting

var hideRibbonTimeout = 0;

var newButtonPresent = false;


//check to see if this the discussion board we want to trim

if (jQuery('#s4-titlerow a:contains(Product)').length > 0) {

       setTimeout(HideRibbonButton, 10);

}

//replace the current "Upload File" button to override the SharePoint button

function HideRibbonButton() {

       $('a[id*="UploadFile-Large"]').replaceWith('<a class="ms-cui-ctl-large newDialog" id="btnUpload" aria-describedby="Ribbon.EditingTools.CPInsert.Links.UploadFile_ToolTip" mscui:controltype="Button" role="button" id="Ribbon.EditingTools.CPInsert.Links.UploadFile-Large"><span unselectable="on" class="ms-cui-ctl-largeIconContainer"><span unselectable="on" class=" ms-cui-img-32by32 ms-cui-img-cont-float"><img unselectable="on" alt="" src="/_layouts/1033/images/formatmap32x32.png" style="top:-224px; left: -64px;"></span></span><span unselectable="on" class="ms-cui-ctl-largelabel">Upload<br>File</span></a>');

       if (jQuery('.newDialog').length> 0) {

              newButtonPresent = true;

       }

       hideRibbonTimeout++;

       if (hideRibbonTimeout < 1000) {

              if (newButtonPresent == false{

                     setTimeout(HideRibbonButton, 10);

              }

       }

}

//handle the "Upload File" click and create our own upload

$('#btnUpload').live('click'function () {

       newButtonPresent = true;

       SP.UI.ModalDialog.showModalDialog({

              url: L_Menu_BaseUrl + "/_layouts/RteUploadDialog.aspx?LCID=1033&Dialog=UploadDocument&UseDivDialog=true",

              title: "Upload a file",

              dialogReturnValueCallback: function (result, value) {

                     if (result == SP.UI.DialogResult.OK) {

                           //adds the link to the body of the discussion post

                           $('.ms-rtestate-write').append($(value));

                     }

              }

       });

       setTimeout(function () {         

       //finds the upload choice dialog box

              var dlg = SP.UI.ModalDialog.get_childDialog();

              if (dlg != null) {

                     var dlgWin = $("html"window.parent.document);

                     //get the iframe with the select box

                     var dlgCont = $(dlgWin).find("#dialogTitleSpan:contains('Upload a file')").parent().parent().parent().find('iframe');

                     //remove the option we want taken out

                     $(dlgCont).contents().find("#ctl00_PlaceHolderRteDialogBody_TargetList option[value='3141e042-d74f-440d-b836-a82b79a576f5']").hide();

              }

       }, 1000);

});


Upload choice has been removed and users are now directed to upload to the correct document library.

choice-removed

ADFS Authentication Unable To Connect To Reporting Services (Workaround)

When trying to set up a datasource in SharePoint 2013 with Reporting Services Integration, if you want to pass through the user’s identity to the report, you will get an error if you try to use the “Windows authentication (integrated) or SharePoint User”.  This is because SharePoint does not allow for SAML / ADFS auth to go through using the build in C2WTS.

Can not convert claims identity to windows token. This may be due to user not
 logging in using windows credentials.

saml-ssrs-beforeThere is a workaround for this that does not require any extra programming, however, it may be an  inconvenience to your users.  Set the mode as “Prompt for credentials” and then check the “Use as windows credentials” checkbox.

saml-ssrs-after

This will allow reporting services to connect to the datasource using the users’ Windows auth account, and allow the report to run.  The downside is they will have to enter their user name and password whenever they want to run the report.

saml-ssrs-enter-username-pw

Success!

saml-ssrs-report-runs

Reporting Services Content Type Names – Wrong Display Names

If you have upgraded from SharePoint 2010 to 2013, and find that the Content Type titles look a bit odd for Reporting Services content types, you may want to change those to something more familiar.  There is a relatively simple fix.

For example, they appear as:

$Resources:ReportServerContentTypeGroup;

   $Resources:DataSourceContentTypeName; Document Home
   $Resources:ReportBuilderContentTypeName; Document Home
   $Resources:ReportBuilderModelName; Document Home

Correct display:

Report Server Content Types

   Report Builder Model Document Home
   Report Builder Report Document Home
   Report Data Source Document Home

So for example, when to create a new report library, and you start adding content types for your reports, you may see something like this:

poorly-named-content-types

To fix this, go to “Site Actions”, “Site Settings.” Click on “Site Content Types.”

navigate-to-content-types

Click on the content type you need to update, and then click on “Name, description, and group”

content-type-settings

Change the title text for the three content types, and give it a group.  For instance:

Report Data Source
Report Builder Model
Report Builder Report

Group: Reporting Services

rename-content-type

Once you have done that, go back into your library, and delete out the previous content types, and re-add them.

updated-content-types

You should then get the correct names displayed when you need to add a new reporting file.

updated-titles

Reporting Services – System Settings (Error: Sorry something went wrong)

While trying to set up Reporting Services for SharePoint 2013, I ran into a “Something went wrong” message in Reporting Services.

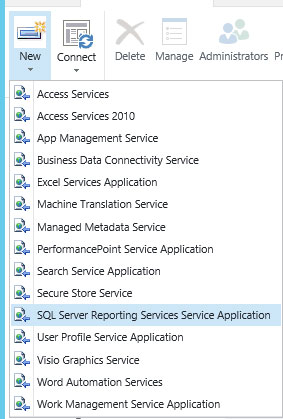
The confusing part is that I was able to provision SQL Server Reporting Services, both verifying that the service was indeed “STARTED” and that I had successfully created a service application and proxy using the GUI from Central Admin.

new-ssrs-app

service-started

reporting-services-application

reporting-services-system-s

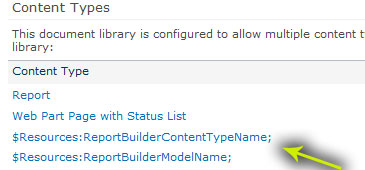
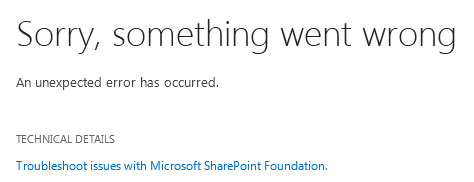
Clicking on the application (“Reporting Services”) brought me to the configuration area, however, when I went in to set it up, I received an error message stating: “Sorry, something went wrong”.

sorry-something-went-wrong

This left me scratching my head. I determined that the SQL 2012 feature: “Reporting Services – SharePoint” must not have been successfully installed.

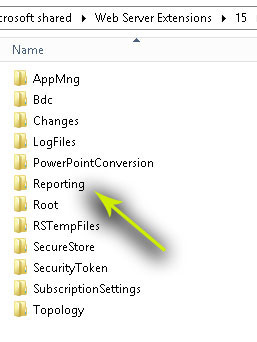
To check this, you will want to go to C:\Program Files\Common Files\microsoft shared\Web Server Extensions\15\WebServices.  Once here, look for the “Reporting” folder.

directory-before

As you can see, there is no “Reporting” folder.  It is missing entirely.  To remedy this, I first attempted to install the feature via my SSRS 2012 SP1 installation disc.

install-step-1

install-step-2 install-step-3 install-step-4

However, when I got the step that would allow me to install the feature, it indicated it had already been installed.

install-step-5

Thus I thought the solution was to re-install it, but this was as far as the SQL 2012 SP1 disc would take me in terms of reinstalling.  To get around this, I first attempted to uninstall the  feature through Control Panel / Programs.  However, that gave me an error message :  ‘Install-SPRSServiceInstall-SPRSService’ is not recognized, when I got to the final uninstall step.

I unprovisioned the service application in Central Admin, and STOPPED the service on the server, and tried again. No luck.

Also , attempting to uninstall the application through Powershell yielded the same “not recognized” results using the following uninstall commands:

Install-SPRSService -uninstall
Install-SPRSServiceProxy -uninstall

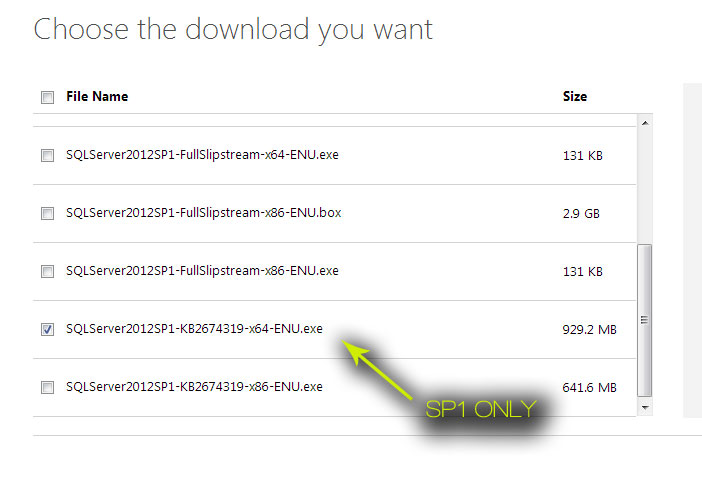
Finally, I discovered a solution.  It turns out that the full installation disc for SQL 2012 SP1 apparently was not sufficient.  Instead, just the SP1 exe need to be installed on top of what is already there, not the full install of SQL 2012 SP1, but just the SP1 bits.

Download it here: http://www.microsoft.com/en-us/download/details.aspx?id=35575

Be sure to choose the correct download, and not the full version.

download-sql2012-sp1-only

After grabbing this, run the install.

run-sp1-install

Verify that that “Reporting” folder is now present.

directory-after

Finally, you can provision your services:

Install-SPRSService
Install-SPRSServiceProxy
get-spserviceinstance -all |where {$_.TypeName -like "SQL Server Reporting*"} | Start-SPServiceInstance

new-ssrs-app

service-started

reporting-services-application

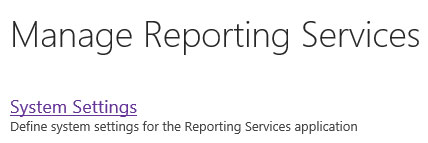
Then click on “System Settings” in your app.
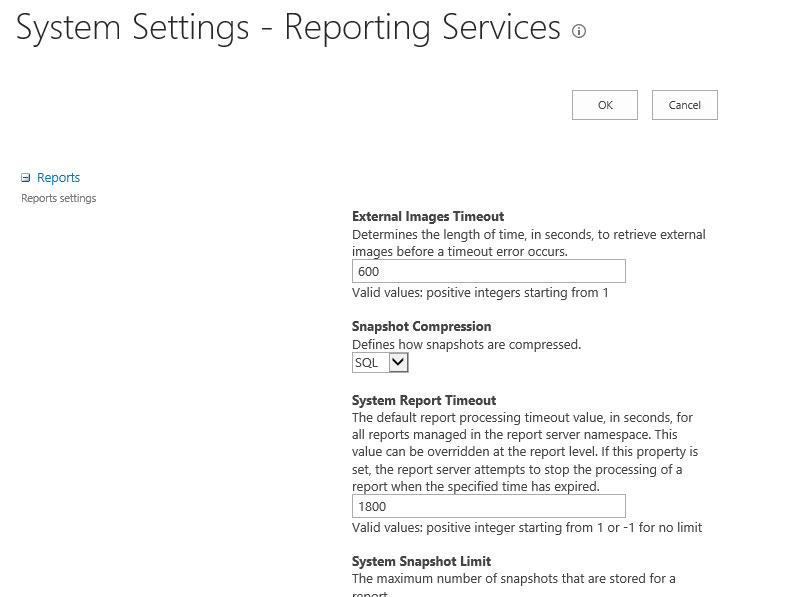
system-settings-success

Success!!!

AppFabric Caching Service Reverts To Disabled

Using the steps outlined in my previous post for the AppFabricCachingService, I was able to get the service up for the server that had going into status: “UNKNOWN.”

However, it would stay up for a few minutes, and then revert “DOWN.” I had to constantly go into “Services” and reset the “AppFabric Caching Service” to “Automatic” and then try running “Start-CacheHost” or “Start-CacheCluster” again.

This had a repetitive effect. Finally, I tried doing the following, and I was able to get the server that had kept reverting to “DOWN” to stay “UP”, and the “AppFabric Caching Service” to stop switching to “Disabled.”

First, log into one of the working (“UP”) cache cluster servers, and fire up Powershell:

Use-CacheCluster

(May be unnecessary, but good to double check this)

Export-CacheClusterConfig c:\clusterconfig.xml

Copy the file over to the server that was reverting to “DOWN” and open it up in Notepad. (You may need to open Notepad as an admin depending on your UAC settings).

Replace : dataCache size=”Medium” with dataCache size=”Small”

Also replace: caches partitionCount=”256″ with caches partitionCount=”32″

Then save the file.
Fire up Powershell on the “DOWN” server and type:

Stop-CacheCluster 
Import-CacheClusterConfig c:\clusterconfig.xml 
Start-CacheCluster

Give it some time, and if necessary, type the following to check the status:

Get-CacheHost

For me, this brought all my servers to the status of “UP” and they stayed there.

Multi-tenancy / Site Subscriptions

One of the benefits of SharePoint 2013 is its ability to scale property for use in a multitenant environment.  In addition to having isolated webs, it also provides for isolation within service applications.  This means, that for instance, Company A can have a web that provides search results that are completely isolated from Company B.  Of those that can be partitioned, some of the most important are the BDC, Search, Managed MetaData and the Secure Store.  Here are the SharePoint 2013 Service Applications that can be partitioned.

Partionable:

Business Data Connectivity
Managed Metadata
Machine Translation Service
Search
Secure Store
User Profiles (via Profile Sync)
Word Automation Service

Non-Partionable:

Access Services
App Management Service
Excel Services
Performance Point
Subscription Settings
State Service
Usage and Health
User Profiles (via AD Import)
Visio Services
Work Management Service

The key way SharePoint takes advantage of multi-tenancy capabilities is through Site Subscriptions.  Site subscriptions allow grouping of Site Collections of the same Web Application to consume the same features and service information.  The key thing to remember is that a site can only have one subscription at a time, and that it has to be managed through powershell.  Once a subscription is set up the service application can be partitioned.

To create a new subscription:

$subscription = New-SPSiteSubscription
Set-SPSite -Identity http:// mydomain.com/sites/billing  -SiteSubscription $subscription

Partioning:

When creating your service application, such as search, add:

-Partitioned

when creating the service in Powershell.

SharePoint Site Not Prompting for ADFS logon, Automatic Windows Auth in IE instead

After migrating “My Sites” from SharePoint 2010 to SharePoint 2013, I wanted to convert the My Sites to claims and then move it over to ADFS 2.0 authentication.   I had no issues with migrating other SP2010 sites to SP13 ADFS claims.  After going through the process for My Sites, I was able to use Chrome and sign into the main site, and then clicking on the “My Site” link will took me to my correct migrated My Site / Profile by logging me in through ADFS.

In IE, however, this was a completely different story.  I could sign into the main site with ADFS just fine.  However, clicking on “My Site”, or navigating there directly took me straight in without ever prompting me to log in via ADFS.  It was defaulting to Windows Auth, even though I had turned off NTLM, and it created a NEW profile for me using my Windows credentials instead of using my existing claims based profile.

Even toggling off “Enable Windows Authentication” in Central Admin under “Authentication Providers” did not stop this from happening.  Windows Auth continued to persist even after disabling this.


It turns out the issue was on the client side (IE), which was to be expected.  The first thing I did was disable all the “Trusted Sites” and “Local Intranet” settings in IE, also turning off “Enable Integrated Windows Authentication”.  This however left me with a windows login prompt.

Finally, as a last attempt, I cleared out my cache in IE.  That did the trick.  Apparently an old cookie was somehow getting picked up and prompting me for Windows Auth instead of the desired ADFS auth.